Friday, March 29, 2013

Create a Logo Chanel Accent Nail w/ Zoya's Pixie Dust Nail Polish

My Chanel Accent Nails with Zoya Nail Polish Pixie Collection

I love the fourth finger accent nail. It's a subtle way to have a design and it's both delicate and edgy without being too in your face. It's also something you can do fast at home, but impress in a big way - and why not go with a designer logo that you adore or, if not that you can pick a simple nail decal of your choosing. I went with the classic Chanel camellia flower, which actually came in a Hello Kitty nail design set purchased at a Sanrio store in Honolulu for about $7, but here's one available online. It may not be authentic Chanel, but with a design so tiny, I hardly think it matters!

Zoya Nail Polish, one of my absolute favorite companies for nail color, b/c it's toluene, formaldehyde and dibutyl phthalate free (so I feel safer applying it on my almost five year old daughter and friends -- not to mention that they've always got the edge on hues and texture) just came out with their Pixie Dust collection. The sparkle on this polish is sensational and superbly saturated. It's great for lifting your spirits for spring.

So do a Chanel Accent nail, or a logo accent nail -- just pick two contrasting colors from the Pixie set, and some decals. EASY! ;-)

THE HOW-TO:

At HOME MANI BASICS:

Have your logo decal ready on hand for the fourth finger. You can even do the index finger if you want. Have an extra decal handy just in case you lose or mess up the nail. Also have tweezers on hand to apply the tiny decals as they are miniature.

1) Start as you would a normal home mani. The basics being that you would soak your hands in warm water, wash them, and moisturize with your favorite lotion. Then hydrate your cuticles with the best balm ever -- Qtica's Intense Cuticle Repair Balm ($18)
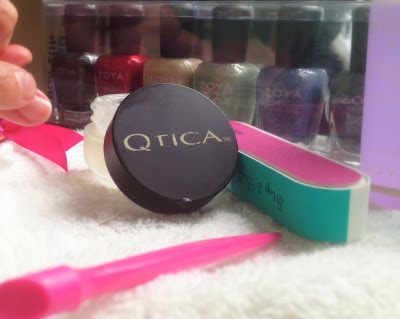
The best editorial manicurists use this on set when I'm doing makeup for actors and models on shoots. Trust me, it's amazing.

2) Push or cut your cuticles. Cut, trim, file and smooth your nails -- whatever you need and desire to do.

3) Apply a base coat.

The Accent Nail with Logo

4) Apply two coats of one color to finger 1, 2 ,3, and 5. In my case I used a periwinkle, Zoya's NYX.

Tip: It's good to have a hand towel underneath, and all your tools w/in hands reach so that you can fix a mistake w/ remover -- and be mess-free. My handy, travel-ready, cute nail kit w/ buffer, file and zip case was found at H&M for $3.
5) Apply two coats of the accent color to finger 4. I used a red, Zoya's CHYNA.


My Chanel camellia decals ready to go with my Rubis Tweezers

6) Apply a coat of base coat to finger 4. Quickly grab your logo decal with your tweezers (my favorites are Rubis Slant), applying on an area of your choice (I picked the upper middle section) and press down evenly on your nail all over the decal so that it adheres well. Here's my quickie video on how to do it:


7) Apply a top coat quickly and press down again with the tweezer to seal the layers.

8) Apply a top coat to all nails. Allow ample time to dry -- 20-30 minutes.

Have a blast! And let me know how it goes - I'm sure you'll have plenty of ideas yourselves! xo

-- N.C.


Wednesday, March 27, 2013

Pro Makeup Secrets from a NYC Set: 3 Tips & Tricks for Everyday

Caption: Zuzanna Bijoch in the Devi Kroell Spring/Summer 2013 campaign
Ever wondered what it’s like to be on-set as a makeup artist? It’s fun, exciting, hard work, and you may be faced with big waiting periods between takes while the photographer does his work during looks, but you’ve always got to be on your toes ready with the baby oil (to shine the legs) or the right brush or lip-liner to get right in there to fix something in a millisecond.

Being a professional makeup artist is terrifically artistic but it’s also about knowing how to take the right direction from the team and theme you’re working with (the stylist, the photographer, the inspiration) And it’s not just about  picking the correct eyeliner and mixing the right shade of lipstick. You’ve got to chip in sometimes and help when there’s a fire to be put out (trust me it happens on any set - sets are chaotic and full of running staff and moving parts and people, and Balenciaga halter’s and Gucci heels - diamond teardrop earrings and Prada gloves flying everywhere;-)!)

But it’s also about following your instinct. When I have my model in my chair and my tools and makeup laid out, I focus. I concentrate on what will reflect the clothes and fashion theme the best, and hone in on what’s been discussed with the creative team, and then the world and set melt away and I paint and smudge and work away. Of course, input comes in here and there, but in the end I trust myself let the art flow. Sometimes it’s messy, sometimes it’s about struggling to get it perfect, but in the end, it’s the process that makes the whole thing worth it. My motto? En Art n’est pas d’erreur.

Zuzanna Bijoch and I, mugging for our iPhones post-shoot

Pro makeup tricks/tips from the set:

I recently had the pleasure of working with model Zuzanna Bijoch, who has the most beautiful round eyes and lush lips for the Devi Kroell Spring/Summer 2013 campaign and it was great gabbing with her and working on her fairytale like face.

1- The makeup was kept natural and beautiful to showcase the accessories, with a browner smokey eye (hot for spring) and a nice matte nude lip, also trending this season. Matte lips are hard to pull off in a nude color so I recommend you exfoliate your lips with a hot wet washcloth by rubbing gently to get the dry skin off. You can alternate with the wash cloth by applying my favorite lip treatment by Qtica (Intense Lip Repair Balm $12) to help moisturize the lips and soften the dry skin for easier exfoliation. This balm is always in my kit to act as a hydrating base for lipstick. It's the absolute best. It's also a great gift for both men and women.
Zuzanna getting a Facial Treatment Paper mask to soothe her skin after a long day of shooting.
2- Another pro tip is to use disposable paper face masks to soothe stressed skin post lots of makeup or a long day. This is an Asian skin secret and SK-II makes the best ones ($90-125), in my opinion as they are treatment oriented. They are great for stressed out skin, and when I feel a model’s skin has been taxed during a long shoot, I will pull out a mask from my kit and apply it to quickly moisturize and rejuvenate her skin (usually for 15-20 minutes is the average time you leave them on). I recommend doing paper face masks once a week to maintain a great complexion. One of my budget faves are the Masque*ology Facial Masks - the Pore Minimizing ones with Mushroom Extract, only $24 for 3 at Sephora.

3- And lastly, always carry straws (I like the neon colored ones from Target, which I also buy for my daughter  :-)- the models and actors get a kick out of the colors), so that while your subjects are drinking their Perrier or having their lunch, they don’t ruin the lip color you so painstakingly applied. Same for you if you don’t want to ruin that perfect red lip on your night out! Haha!

For the nude lips I did on Zuzanna try CoverGirl's LipPerfection Lip Color in Kiss 275 ($7) YSL's Rouge Pur Couture Pure Color Lipstick in 24 Blond Ingenu ($24) 
 

-- N.C.